Egg Pasta
Dinners, Fridge/Freezer meals, Holiday, Side Dishes
Ingredients
1 cup of AP flour or Semolina
1 cup Bread flour
1 tsp. salt
4 large eggs (*1, 2)
Spray bottle with water
Dough roller
Dough cutter, pizza wheel, or sharp knife
Cooling rack, tea towel, or pasta rack (*3)
Spray bottle of water
2-4 quarts of water or broth
Description
Even if you need multiple batches, don't work with more than one at a time.
If it takes too long to finish the whole process, your noodles will get dry too early and crack. You can make the dough for multiple pounds, then leave each wrapped up until you get to it (in the refrigerator if it will be a different day).
*All of the pasta roller settings are for a Kitchenaid roller attachment.
Directions
Basic pasta:
Put flour and salt in a bowl. Stir together and make a well.
Drop in eggs. Mix until incorporated by drawing flour into the center well and stirring it in. If it is too dry to all come together, spritz lightly with water.
Turn out onto a lightly floured surface and knead into a smooth, firm ball that no longer sticks, adding flour only if needed.
Coat your ball in flour, put it in a bag or lidded container and let it sit for at least 30 minutes.
Cut your dough ball into 4 pieces and coat them lightly in flour. Put the pieces in your bag or container and work with them one at a time.
Put through the roller on setting 1. Fold and repeat, flouring if necessary, until it is relatively smooth and has no holes.
Set the roller on 2. Then run through 2-3 more times without folding.
If you are making dumpling or "pot pie" type noodles, stop here. If you are making regular noodles, roll the sheet again on 3. If you are making semolina pasta, run through the roller again up to the number specified for the pasta type.
Trim up wonky ends, then rub the sheet lightly with flour. Put the scraps in your container or bag for later.
Run through a noodle cutter or cut into desired shape using cookie cutters, ravioli stamps, a pizza cutter, or a knife.
Lay out on a tea towel, cooling rack (with no rust), or hang on a noodle rack, and allow to dry a half hour to overnight, depending on type.
Regular flour pastas should be completely dried to prevent the pasta from simply dissolving away or sticking. If your pasta is on a tea towel or cooling rack, flip it over once after several hours to make sure it dries evenly. Semolina pasta is sturdier and can be used the same day without completely drying.
Roll and cut the collected scraps, when the dough starts to feel tough, discard it.
Once the pasta is dried, use it, or move it to a bag or container and refrigerate for several days, or freeze for several months. (*4)
Do not warm or defrost, put in your boiling liquid straight from the fridge or freezer when you cook them. 


Cooking:
Bring salted water or broth to a boil. If your pasta is still on the counter, gather it up on a sheet tray or plate.
Don't try to cook more than 2 pounds of pasta at once. Add the pasta in handfuls, spreading it out across the pan, until you've added it all (unless directed otherwise), turn down to a gentle simmer and stir frequently (but gently). Cook until soft through and not floury in the center.
How long this actually takes varies, but in general:
6-7 thinness will take 2-4 minutes
4-5 thinness will take 4-10 minutes
3 thinness will take 10-20 minutes
2 thinness will take 25-60 minutes
Pasta soaks up a lot of liquid as it sits, so it’s beneficial to have extra broth or sauce for leftovers or pasta that will sit a long time.
"Pot pie" and dumpling noodles can be partially cooked a day ahead. Cook them until they are no longer floury, but still slightly firm. The next day, warm the noodles over low heat (like a crock pot) until hot and completely cooked.
Specialty Pasta:
Pierogi (varenyky)
Pennsylvania Dutch Pot Pie
Pappardelle
Roll your sheets up to 6. Trim to the length you want your noodles.
Lightly flour, then roll up somewhat loosely. Use a sharp knife to cut the pasta to about 1 inch wide. Pappardelle is meant to be somewhat rustic, so don't worry about being precise. Unroll and lay out. I don’t recommend hanging this one because you don’t want the noodles to break as they dry.

Fettucine
Roll sheets up to 5. Trim to the length you want your noodles.
Run through a noodle cutter or roll up and cut in the same fashion as pappardelle but cut the noodles to 1/4 inch wide. 
Tagliatelle
Roll sheets up to 6. Trim to the length you want your noodles.
Run through a noodle cutter or roll up and cut in the same fashion as pappardelle but cut the noodles to 1/4 inch wide.
Fusilli
It can be cylindrical or spiral; these instructions are for spirals.
Roll the sheets up to 5. Cut as you would fettuccine. If you don’t have a noodle attachment, use the same method as pappardelle but cut the noodles to 1/4 inch wide.
Gently wrap each noodle around a metal knitting needle or ferro, then gently push the pasta off onto a towel or cooling rack. If the pasta is sticking, you need to flour your sheets better before cutting. This pasta can be used the same day, but will hold its shape better if it is allowed to dry completely.

Farfalle
You may want a ruler; you will need a straight edged cutter like a pizza wheel, and a ravioli cutter.
Roll out your sheets up to 6 or 7. Use the straight cutter to cut each sheet lengthwise into 1 inch wide pieces. Then use the ravioli cutter to cut the strips into 1-2 inch pieces, depending on preference. 
Fold each piece in half, then draw the edges up to the top of the folded piece. Pinch firmly in the center.


This pasta can be used the same day, but will hold its shape better if it is allowed to dry completely.
Ravioli
Makes enough for about 5 people if the recipe is not scaled. You will have the best results if you cook in batches, just enough for 1-2 people at a time and pull the pasta out with a slotted spoon or spider. Don't forget to make one extra to test the cooking time (it should be 7-8 minutes).
To make ravioli, you will need a ravioli mold, stamp, or wheel. These instructions are for using a stamp. You will also need Ricotta Cheese for the filling, a scooper or tablespoon, and baking sheet(s) with parchment.
After you have made your dough and it is resting, prepare the ricotta. If there is a lot of moisture, put the ricotta in a tea towel to wick it away. Mix it with salt and pepper to taste if needed.
Cut your dough ball into 8 pieces instead of 4. Roll two sheets at a time to 6.
Lay out. Use the stamp to give yourself an idea of where the center of each ravioli will be. Scoop about a tablespoon of ricotta into the center of each ravioli. 
Lay the second sheet over the first, then press your fingers around each ball of ricotta and out to seal. Try not to stretch the dough covering the filling too much, you don't want holes.
Push the stamper down firmly on the dough and slide around a bit to make sure it goes through. Peel away the scraps. 
As you move your raviolis to a tea towel, press around the edges again to make sure they are sealed; this will also help keep them from being too thick.
As you start working with scraps, you may find that the dough doesn't seal. Dip your finger in water and run it over the bottom sheet before placing the top one.
Let the ravioli dry for at least a half hour.
Lay your raviolis out on the baking sheet covered with parchment and freeze solid, about an hour. Then either cook them or move them to a bag or container for storage. Do not let them thaw before cooking.
Spaghetti
Roll sheets to 4. Cut in the spaghetti cutter. 
Lasagnette
Lasagnette can be found with two straight edges, two shaped edges, or one of each. The last option makes them more closely resemble what they basically are- half lasagna noodles.
You will need a straight edged cutter like a pizza wheel and a ravioli wheel, and a 12 inch ruler.
Roll your sheets out to 5. Trim to 12 inches in length.
Using the ruler’s height as your guide, cut strips, alternating between the pizza wheel and ravioli cutter.

Notes
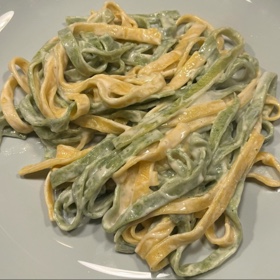
*1 For veggie pasta, substitute one egg with 1/4 cup cooked, drained, and puréed veggie like spinach, carrot, tomato, or pumpkin. You can replace up to two eggs in semolina pasta. If your pasta is not coming together nicely because your veg is on the dry side, add another egg.
*2 If you have egg yolks you need to use up, or just want to make a richer, more yellow or orange pasta, you can replace each whole egg with two egg yolks and add 1-2 extra yolks depending on how the dough is coming together.
*3 A cooling rack is great when it is fairly new, but older ones will start to leave oxidation marks on your pasta. Harmless, but gross looking. Noodles dried on a pasta rack will often crack and fall off as the dough dries. For most regular noodles this isn't a big deal, just make sure your noodles are a good length to begin with. If you are making a semolina pasta and you need them to be very long, make sure you cook them the same day, or if you can't, put them on a tea towel or cooling rack instead.
*4 Long noodles can be a pain to freeze because they take up so much space and are at risk of getting broken if they aren't in a hard container. Compact noodles like dumplings or "pot pie" squares however freeze beautifully. They take up less space and can be kept in a bag without worry of getting broken.